3d Uber-Printer Build (Voron 2.4)

Discussion of all things technological and/or gadgety
Post Reply
User avatar
Netpackrat
Posts: 13986
Joined: Fri Aug 15, 2008 11:04 pm

Re: 3d Uber-Printer Build (Voron 2.4)

Post by Netpackrat »

So, assembly is pretty much finished now except I am waiting on some ferrule connectors and the crimper required for them, in order to hook the hot end heating element up to the toolhead PCB. This is because I am using an E3D Revo Micro hot end and not the standard V6 style, for which the kit included both a pre-terminated heating cartridge and thermistor. And I need to install/configure the Klipper firmware, which promises to be interesting.

Image

Before I could start making connections in the electronics bay, I needed to flip the printer back on its feet and complete the above deck wiring. Most of this runs in drag chains down into the electronics bay. I found that with the Z belt tails on the right side secured how the build manual shows, that they interfered with travel of the drag chains, so I ended up cutting them both shorter, and securing the remaining tail to the belt with some kevlar thread from my fly tying supplies.

You can also see details in this picture such as the toolhead PCB, which provides a convenient location for connection of all the items on the print head, which are then run to a single connector for a separate wiring loom that runs through the drag chains and down to the electronics bay. There they connect to a breakout PCB, from which the individual circuits once again emerge to be connected to the BigTreeTech Octopus mainboard. The one-piece toolhead PCB was actually intended for the Afterburner/Clockwork 1 print head, while Stealthburner/Clockwork 2 use a different 2 piece toolhead PCB set. LDO came up with a set of modified parts to make this PCB work with SB/CW2, which is one of the things that necessitated re-printing some of the print head parts.

Image

Rat's nest in progress.

Image

Wiring connections completed and secured. There is also a cover panel that goes over this; you can see the brass heat-set inserts for it on the skirts.

Image

Panels and doors installed.
Cognosce teipsum et disce pati

"People come and go in our lives, especially the online ones. Some leave a fond memory, and some a bad taste." -Aesop
User avatar
HTRN
Posts: 12401
Joined: Wed Aug 20, 2008 3:05 am

Re: 3d Uber-Printer Build (Voron 2.4)

Post by HTRN »

I just noticed on materhackers order page that you now have the option to replace most of the Voron printed parts with machined aluminum at additional cost, like 400 bucks. They also offer a Mosquito Magnum hot end(personally I'd prefer a magnum +, but that's quibling) ,and a bondtech extruder. It's a shame they don't offer the X2-M so you can mount twin hot ends - the idea of printing water soluble supports is particularly appealing.

https://www.sliceengineering.com/collec ... r-mosquito
HTRN, I would tell you that you are an evil fucker, but you probably get that a lot ~ Netpackrat

Describing what HTRN does as "antics" is like describing the wreck of the Titanic as "a minor boating incident" ~ First Shirt
User avatar
Netpackrat
Posts: 13986
Joined: Fri Aug 15, 2008 11:04 pm

Re: 3d Uber-Printer Build (Voron 2.4)

Post by Netpackrat »

HTRN wrote: Mon Mar 13, 2023 1:09 am I just noticed on materhackers order page that you now have the option to replace most of the Voron printed parts with machined aluminum at additional cost, like 400 bucks. They also offer a Mosquito Magnum hot end(personally I'd prefer a magnum +, but that's quibling) ,and a bondtech extruder. It's a shame they don't offer the X2-M so you can mount twin hot ends - the idea of printing water soluble supports is particularly appealing.

https://www.sliceengineering.com/collec ... r-mosquito
Yeah I have seen the machined aluminum parts available from various places. I think they would make sense in some places more than others. I think the main criticism against them is added weight which won't matter for a lot of the parts that are located in a fixed position, but for anything on the gantry they are going to limit accelerations and increase print time. Also many of the printed parts are designed with the flexibility of the plastic in mind. Some have bought the aluminum parts and couldn't get their extruder latch to close because the aluminum parts don't flex. I think they might negatively affect the interface between the gantry and the 4 Z drives, where the parts need to flex a little too.

Not much new to report. This coming week I am planning to start messing with the firmware and hopefully get it up and running. I didn't mess with it much last week due to being busy replacing the brakes on my truck and clearing snow off my roof. Now I have to replace the hot water heater in my house but I also have this week off, so I should be able to find time to work on the printer.
Cognosce teipsum et disce pati

"People come and go in our lives, especially the online ones. Some leave a fond memory, and some a bad taste." -Aesop
User avatar
HTRN
Posts: 12401
Joined: Wed Aug 20, 2008 3:05 am

Re: 3d Uber-Printer Build (Voron 2.4)

Post by HTRN »

Netpackrat wrote: Mon Mar 13, 2023 8:09 amNow I have to replace the hot water heater in my house but I also have this week off, so I should be able to find time to work on the printer.
Regular water heater, or are you gonna do a heat pump water heater, or one one of those on demand water heaters?
HTRN, I would tell you that you are an evil fucker, but you probably get that a lot ~ Netpackrat

Describing what HTRN does as "antics" is like describing the wreck of the Titanic as "a minor boating incident" ~ First Shirt
Cobar
Posts: 1519
Joined: Mon Aug 18, 2008 6:23 pm

Re: 3d Uber-Printer Build (Voron 2.4)

Post by Cobar »

HTRN wrote: Mon Mar 13, 2023 1:09 am It's a shame they don't offer the X2-M so you can mount twin hot ends - the idea of printing water soluble supports is particularly appealing.
Last shop I worked at was setup for the water soluble supports. It made printing complex stuff pretty simple.
User avatar
Netpackrat
Posts: 13986
Joined: Fri Aug 15, 2008 11:04 pm

Re: 3d Uber-Printer Build (Voron 2.4)

Post by Netpackrat »

HTRN wrote: Mon Mar 13, 2023 1:46 pm
Netpackrat wrote: Mon Mar 13, 2023 8:09 amNow I have to replace the hot water heater in my house but I also have this week off, so I should be able to find time to work on the printer.
Regular water heater, or are you gonna do a heat pump water heater, or one one of those on demand water heaters?
As it turns out, adjustments to the thermostat are more effective when they are made in the correct direction. So, my hot water heater is still 20 years old and need to be replaced, but it is no longer urgent. It's a regular hot water heater, and will be replaced with another regular hot water heater.
Cognosce teipsum et disce pati

"People come and go in our lives, especially the online ones. Some leave a fond memory, and some a bad taste." -Aesop
User avatar
Netpackrat
Posts: 13986
Joined: Fri Aug 15, 2008 11:04 pm

Re: 3d Uber-Printer Build (Voron 2.4)

Post by Netpackrat »

Major progress the last couple of days on this. The ferrule connectors I ordered for connection of the hot end heater to the toolhead PCB arrived but before sorting that out I loaded the firmware and the interface software, since it is better to do that with the heaters disconnected. Apparently sometimes the board maker will forget to flash over their test firmware prior to shipping, so people have reported all the heaters and fans coming on at first start up. The firmware is Klipper, and I am running Mainsail as the web interface on the Raspberry Pi 4B that talks to the printer mainboard. Using Octoprint like I have on my Prusas was also an option, but it sounds like Mainsail will be easier to work with and less resource intensive.

Image

These are the ferrule connectors I was waiting for. I ended up having to take the toolhead PCB back off entirely to get enough access to insert them into the connector on the PCB. A lot of wire connections in a very small space there.

Image

The completed print head all closed up with the cover in position over the PCB.

Image

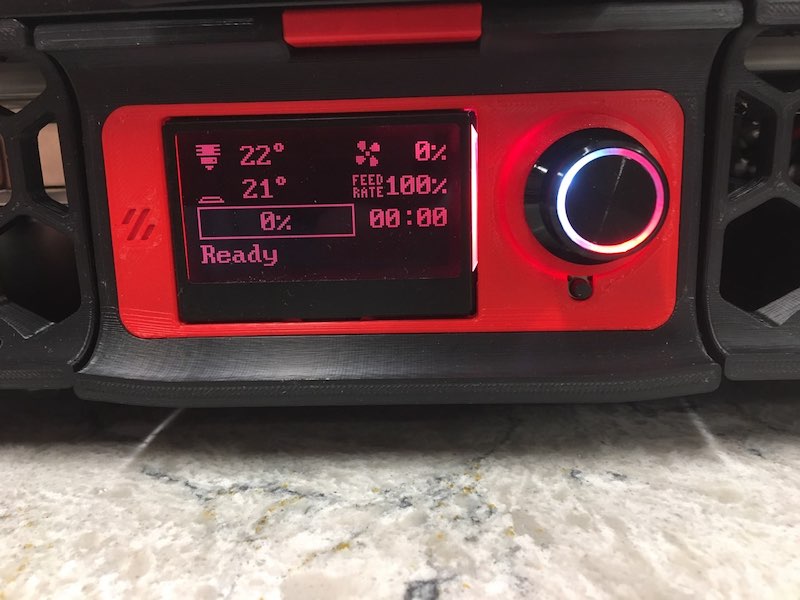
It's alive! Still a lot of work to do at this point getting everything configured. One of the nice things about the Klipper firmware is that you specify everything in the configuration file, which you can edit any time through Mainsail. This ends up being a lot more forgiving than the Prusa firmware used with my last build, where you have to make all the changes you want, compile, then flash the firmware to the board and hope it all works.

Image

Here it is with all of the lights working.

So at this point I have it basically ready to go, and I just need to configure the slicer and generate some gcode for a test print. Had some pain last night getting the print area set up. The setup guide has you set up the homing, and then find the origin and adjust the homing location (it homes on opposite corner from origin) to set it in the right position over the corner of the print bed. I forgot that the location of the Z-end stop for homing the Z axis is defined in relation to the X-Y home, so when I changed the Z and Y max, I needed to apply the same changes to the Z endstop location. I didn't do this, so when I went to re-home, the result was that the nozzle crashed on the edge of the print bed rather than hitting the Z endstop and triggering the microswitch. This bent a brand new, $25 Revo nozzle before I could hit the emergency stop on the Mainsail console. No other damage was done, and I have a new 0.40mm nozzle ordered, but I will now be making my first prints with the .60mm nozzle. :oops:
Cognosce teipsum et disce pati

"People come and go in our lives, especially the online ones. Some leave a fond memory, and some a bad taste." -Aesop
User avatar
Netpackrat
Posts: 13986
Joined: Fri Aug 15, 2008 11:04 pm

Re: 3d Uber-Printer Build (Voron 2.4)

Post by Netpackrat »

Forgot to mention, that probably the weak point of the Voron design is the whole Z end stop arrangement. This consists of a microswitch activated by a pin just behind the print bed. To home Z, first the X and Y axes are homed. Then the print head goes to the location of the Z end stop, and presses the nozzle to the pin to activate the microswitch. The ONLY thing the resultant location is used for, is as an origin to calculate the Z-offset for first layer calibration (i.e. the amount the squish or the thickness of the first layer of plastic on the bed). For the quad ganty leveling (tramming the gantry to the bed), and for determining the bed mesh (basically a map of bed height that's used to compensate for imperfect flatness of the bed), an inductive probe in the print head is used that senses the steel print sheet. Voron used a relatively low quality probe that's heavily affected by temperature, and is known to fail. Everybody hates the inductive probe, so there have been various modifications made both user-created and official to try to improve on what is fundamentally a stupid setup.

Prusa figured all of this out years ago. They did away with the physical Z endstop, and they use a high quality inductive probe for all of these functions. The latest version of their probe (aka the SuperPinda) is also less affected by temperature than either their older versions, or the Omron probe used in the Voron. Since there's a printed adapter already available for it, I suspect that eventually I will fit a SuperPinda in place of the Omron probe, which is apparently not super popular in the Voron community (Not Invented Here, and it's a proprietary part) but if it works it works.
Cognosce teipsum et disce pati

"People come and go in our lives, especially the online ones. Some leave a fond memory, and some a bad taste." -Aesop
User avatar
Netpackrat
Posts: 13986
Joined: Fri Aug 15, 2008 11:04 pm

Re: 3d Uber-Printer Build (Voron 2.4)

Post by Netpackrat »

Currently printing. I still have a lot of tuning to do but it's off to a good start, with relatively few problems in the setup compared to how it could have gone. There's a seed starter for gardening that I downloaded off Printables and made for my wife to use in her mini greenhouse... The basin took over 16 hours to print on the Prusa, and total with all the pots was over 30 hours of print time. I sliced it for the Voron at the default settings, which shows it as being a 6 hour, 10 minute print.

That's not apples to apples since I am using the 0.6mm nozzle in the Voron, as opposed to the 0.4mm in the Prusa. I could have switched the Prusa to a 0.6 also and saved a lot of print time, but not over 10 hours worth. Plus I haven't run Input shaping (basically a resonance calibration using an accelerometer mounted to the print head) yet, or done anything else to tune the Voron for higher speeds.
Cognosce teipsum et disce pati

"People come and go in our lives, especially the online ones. Some leave a fond memory, and some a bad taste." -Aesop
User avatar
Netpackrat
Posts: 13986
Joined: Fri Aug 15, 2008 11:04 pm

Re: 3d Uber-Printer Build (Voron 2.4)

Post by Netpackrat »

Netpackrat wrote: Thu Mar 16, 2023 3:10 am Currently printing. I still have a lot of tuning to do but it's off to a good start, with relatively few problems in the setup compared to how it could have gone. There's a seed starter for gardening that I downloaded off Printables and made for my wife to use in her mini greenhouse... The basin took over 16 hours to print on the Prusa, and total with all the pots was over 30 hours of print time. I sliced it for the Voron at the default settings, which shows it as being a 6 hour, 10 minute print.
The Voron Design motto is "We build space shuttles with gardening tools, so anyone can have a space shuttle of their own." Just realized I am using my new space shuttle to build gardening tools.... :roll:
Cognosce teipsum et disce pati

"People come and go in our lives, especially the online ones. Some leave a fond memory, and some a bad taste." -Aesop
Post Reply